Case 1: Post Core and Zirconia Crown on #24 - Part II
- lyly mong
- Aug 9, 2023
- 2 min read

My first case went well with thorough supervision and guidance from Dr. Nol Rithy. I'm wholeheartedly grateful and appreciative of his guidance during the process. As I worked on the case, I learned more about prosthodontics and my interest in this subject heighten. It will be one of the most memorable first dental treatment cases in my career.


Fig 1. Metal Post-Core was cemented with Fuji Plus Capsule, then prepare the abutment for full contour zirconium crown.


Fig. 2
The impression was taken. (apical extension on the palatal surface was not clear on impression). The metal post core abutment for zirconia crown.


Fig. 3
Provisional Crown was provided with occlusal clearance not contacting the antagonist tooth

Fig 4. Shade Selection
follow the color of the adjacent teeth 2M2

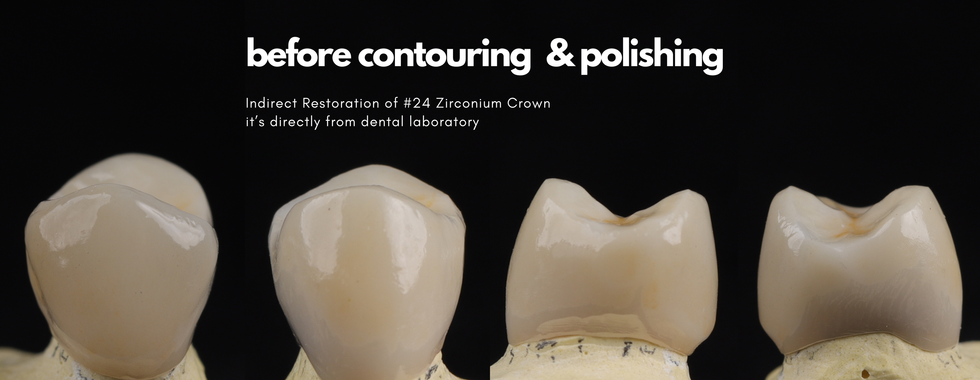

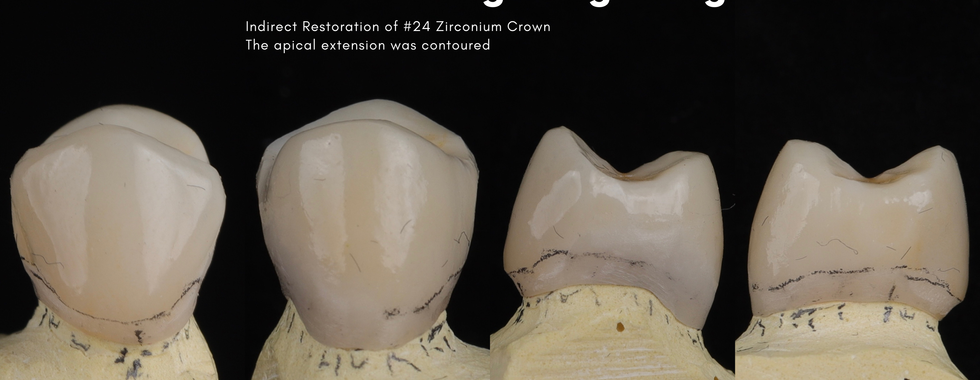


Fig 5.
The gingival extension is over-contoured when it sent from Dental Lab. The over-contouring will put pressure on gum and consequently might lead to gingival recession. The 0.5 mm gingival extension was re-contour circumferentially to follow the natural convexity emergence profile, which follow the concavity of root surface at CEJ.


Fig 6.
The round diamond is used to grind the overcontoured surface
The needle shape stone is used to trim the margin evenly
The wheels polishers are used in 3 steps as followed: BLUE, PINK and YELLOW

Fig 7.
The overall view of tooth surface after contouring and polishing


Fig 8.
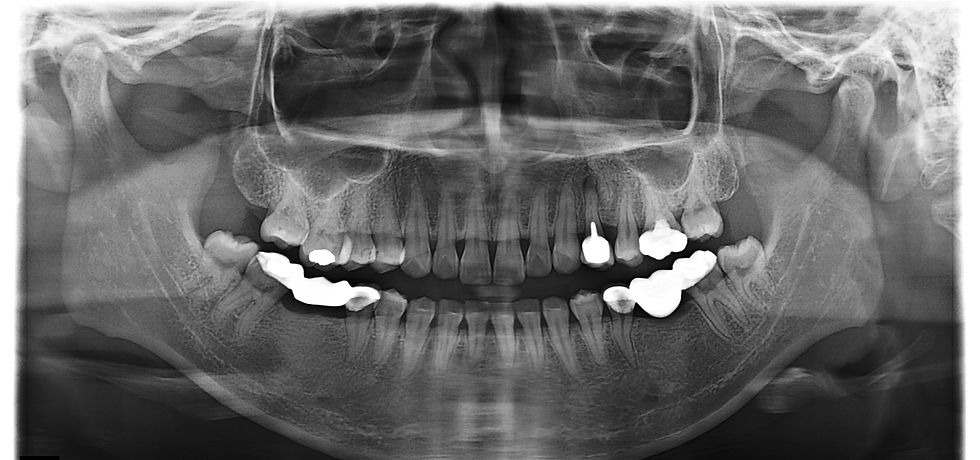
(Left Image) An X-ray film was taken to confirm the crown and root contour.
(Right Image) the X-ray film was taken during provisional crown cementation to ensure all excess cement were removed.


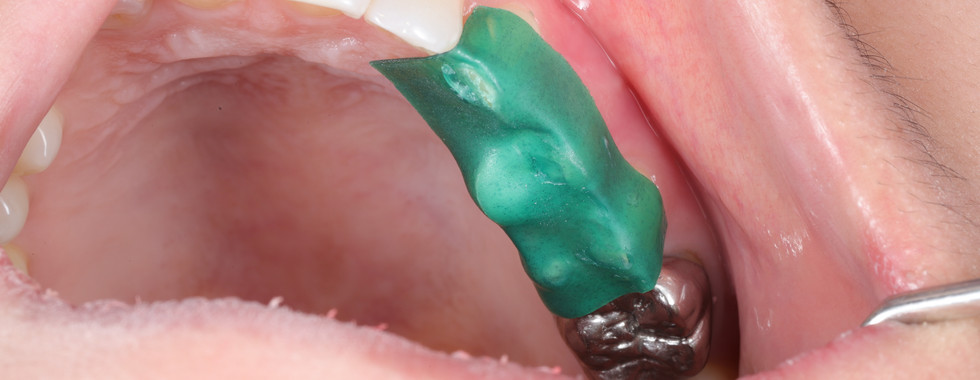
Fig 9.
After some correction to the contact point, the crown fitted in. Then, crown was cemented with 3M™ RelyX™ Unicem 2 Self-Adhesive Resin Cement. Finally, checking occlusion follow canine guidance.
Comments